Sponsored by

Cardboard Robot
Do you have bored kids? Do you need a gift for the creative weirdo in your life? Are you the creative weirdo and you’re just now admitting it? At Cardboard Robot, we can help you get what you need to feed your inner maker. We carefully select the best art supplies, craft kits, nice paper, and clever toys for all of your creative, brain-building needs. So…what are you going to make today?
Paper Project: Gnomebook!
Sponsored by
Cardboard Robot
Do you have bored kids? Do you need a gift for the creative weirdo in your life? Are you the creative weirdo and you’re just now admitting it? At Cardboard Robot, we can help you get what you need to feed your inner maker. We carefully select the best art supplies, craft kits, nice paper, and clever toys for all of your creative, brain-building needs. So…what are you going to make today?
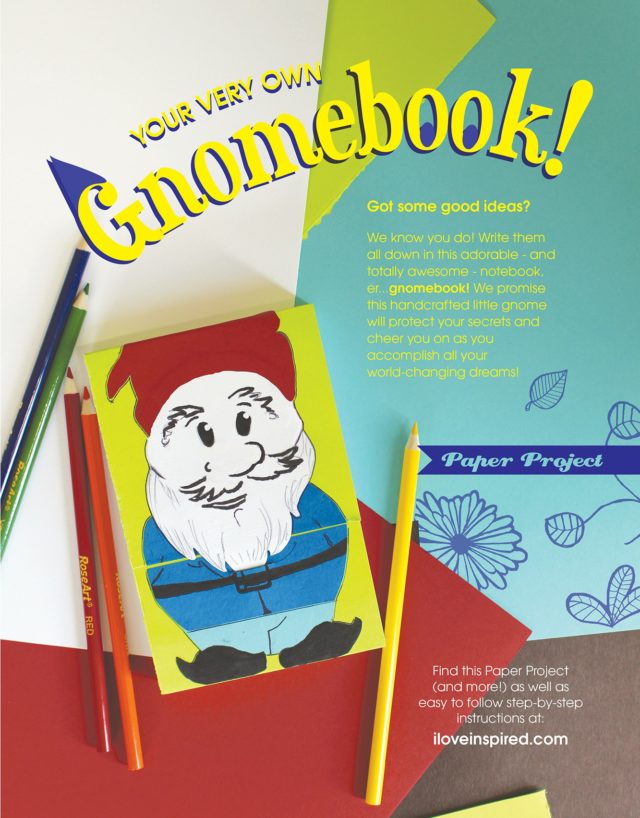
If you’ve never had a little gnome buddy, you’re missing out! Whether jotting down secrets or grocery lists, your bearded garden friend will keep them safe in your very own gnomebook.
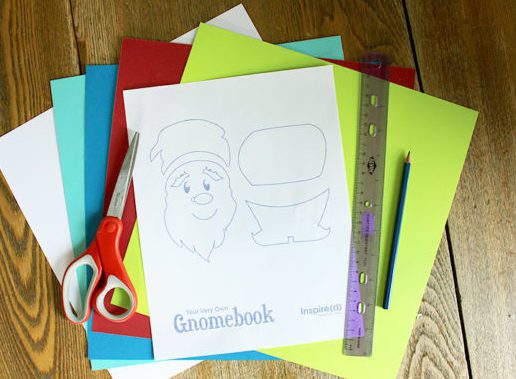
What You’ll Need:
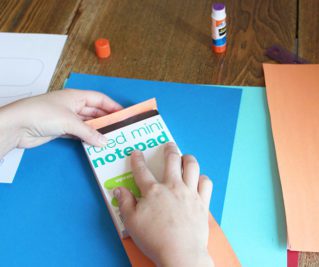
4 x 6 Notebook, Scissors, glue stick, pen/pencil, a variety of colored cardstocks, ruler, colored pencils/markers, and the gnomebook template.
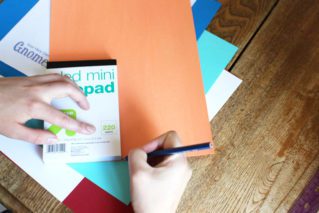
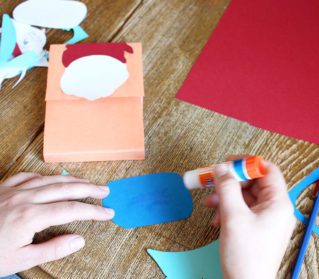
First, you’ll need to make a wrap for the entire notebook. This will serve as the background for your gnome. We chose bright colors, orange and green, for our gnomes.
You will need two pieces to cover the notebook completely. Cut out an 11″ long strip of cardstock to fit around the notebook.
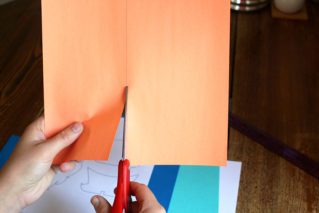
Next, secure this strip to the back of the notebook with glue. The top of this strip will fold over the top of the notebook a little bit. Make the top crease and the crease that comes up around the notebook (so it can eventually flap shut with the gnome bearn).
Glue the section of the strip that will attach to the back of the notebook.
Glue down the top flap to attach to the notebook.
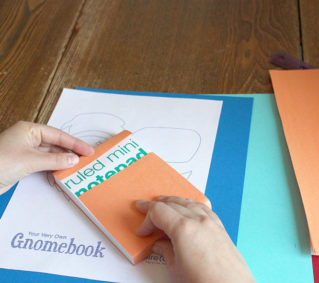
Cut another strip to fit the front/top of the notebook. This one will be about 4″ long.
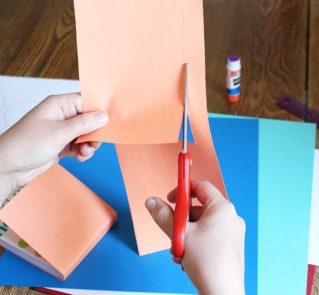
Glue this flap to the top of notebook (on top of your first flap) and fold it around the front/top of the notebook.
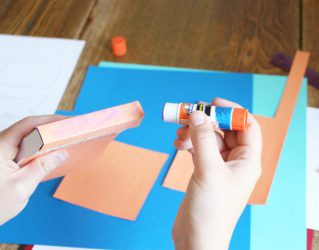
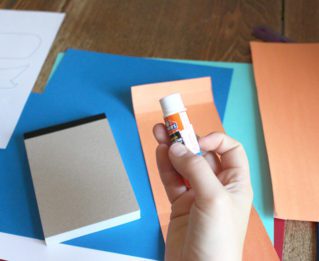
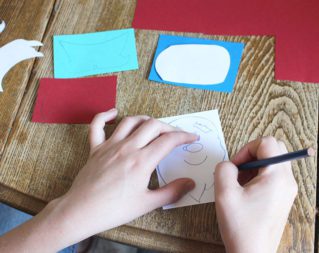
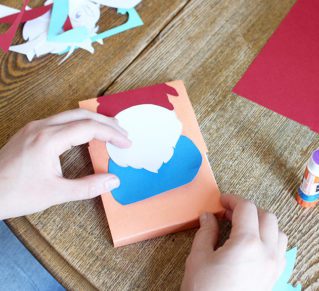
Print and cut out the gnomebook template. Trace the head, hat, body, and pants on different colored cardstocks (or print the template out on different colored cardstocks…mix and match to make different gnomebooks!). I chose to trace mine, but feel free to do what is most fun for you!
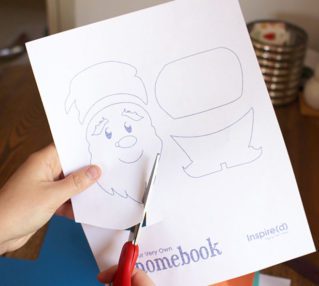
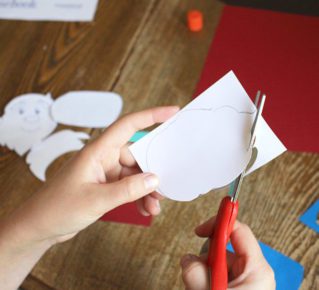
Cut out the gnome pieces.

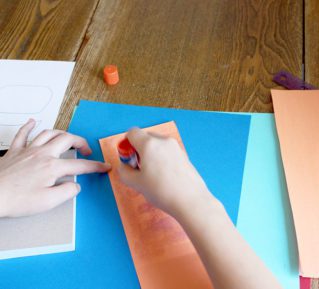
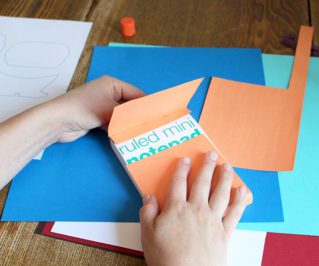
Now its time to start assembling the gnome! Start with the head and hat. Glue the head on so that the beard hangs off the top flap. Make sure not to glue the bottom part of the beard, because then you won’t be able to open the notebook! 🙂
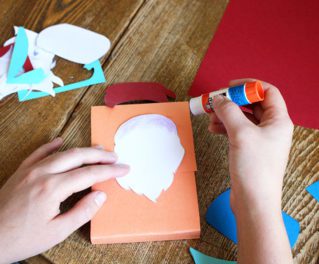
Next glue on the hat. It will fold over the top of the notebook just a bit. Glue it up well so it stays on there!

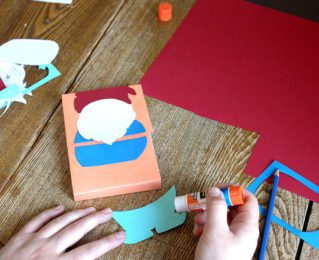
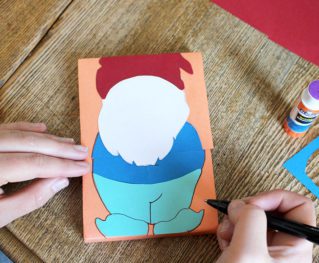
Next, tuck the shirt piece under the gnome’s beard. Glue the top part of the shirt onto the top flap of the notebook, then cut the shirt where the flap ends.
Then glue the bottom half of the shirt onto the bottom part of the notebook (the two pieces of the shirt should come together where the flap comes down, and remember the beard will tuck in to close the notebook). Glue the pants on now, you know, right where this gnome’s pants might be!
Now comes the part we’ve been talking about – getting the gnome’s beard to tuck into his belt buckle so he keeps your notebook shut and your secrets safe! Mark on the shirt where the bottom of the beard hits.
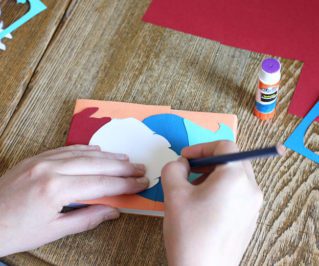
Then, make a slit with scissors or an exacto knife. The slit should go through all pieces of cardstock.
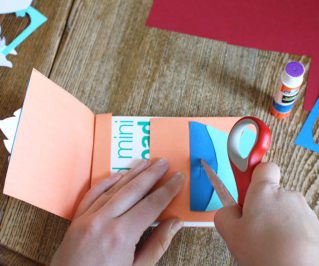
Give it a test to see if it works!
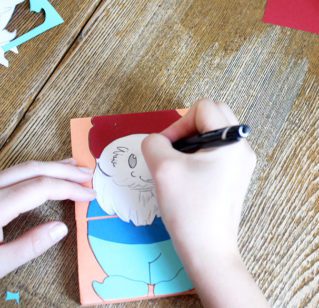
Now comes the tricky part- cartooning a cute gnome face. Get creative, or just use gnomebook template and darken the lines. Start with pencil and finish off your design by tracing details with a pen or felt tipped marker.

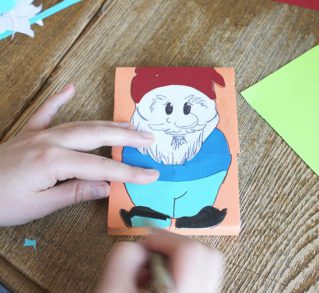
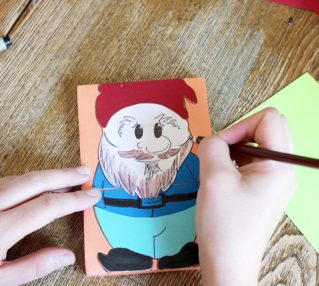
Time for the finishing touches. Use markers and/or colored pencils to add color to the gnome’s boots, belt, and beard.
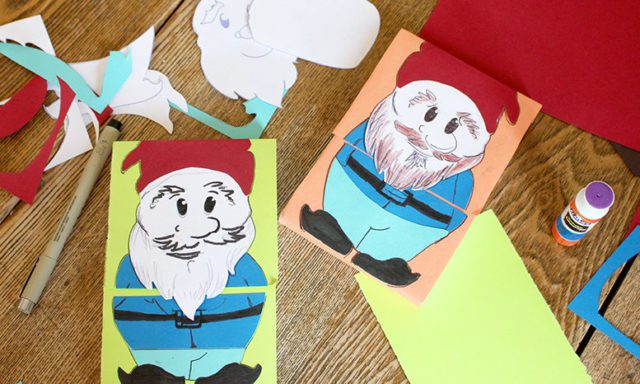
When you’re satisfied with your creative touches, these gnomebooks are ready for their first scribbles!
Kristin An derson is a Luther Grad from Des Moines where she designs graphics, paints, eats, and dreams of owning a vegetable farm. To see more of her work check out her webpage!