Spring brings a promise of nature awakening. Migrating birds reappear, bees start buzzing their wings, and germinating seeds begin to stir.
And as the days grow warmer and longer, some humans become more energized too. The prospect of blue skies and blooming flowers brightens our moods. The heightened energy generates excitement, and we start to plan for positive change.

Yet for others, the new energy can feel jarring. Life ramps up, as does a sense of overwhelm. Change can signal fear, especially if we have a habit of expecting the worst. Even if we chastise ourselves for letting our worries or fears overcome us, we can’t seem to escape the pattern of doom-and-gloom.
If the latter sounds like you, you’re not alone. The good news? Your mindset is never set in stone. Even if you don’t believe it (yet), there are better days ahead.
The Worst (and Best) Case Scenario
You can take solace in the fact that there’s a very good reason your mind gravitates toward negativity: Your brain is not designed to make you happy. Your brain is designed to keep you alive. It is primed to scan the environment for danger… and when danger is not immediately present, it tends to create it.
Many people live with worry on constant circulation. Our brains ruminate because we want to feel in control. Worriers often believe that rehearsing for the worst (sometimes most unlikely) scenario can help us better prepare for it. However, that is often not the case.

Worry chases you down a dark alley of repetitive thinking and fear. That “worst-case-scenario” keeps you trapped there, over something that will likely never come to pass.
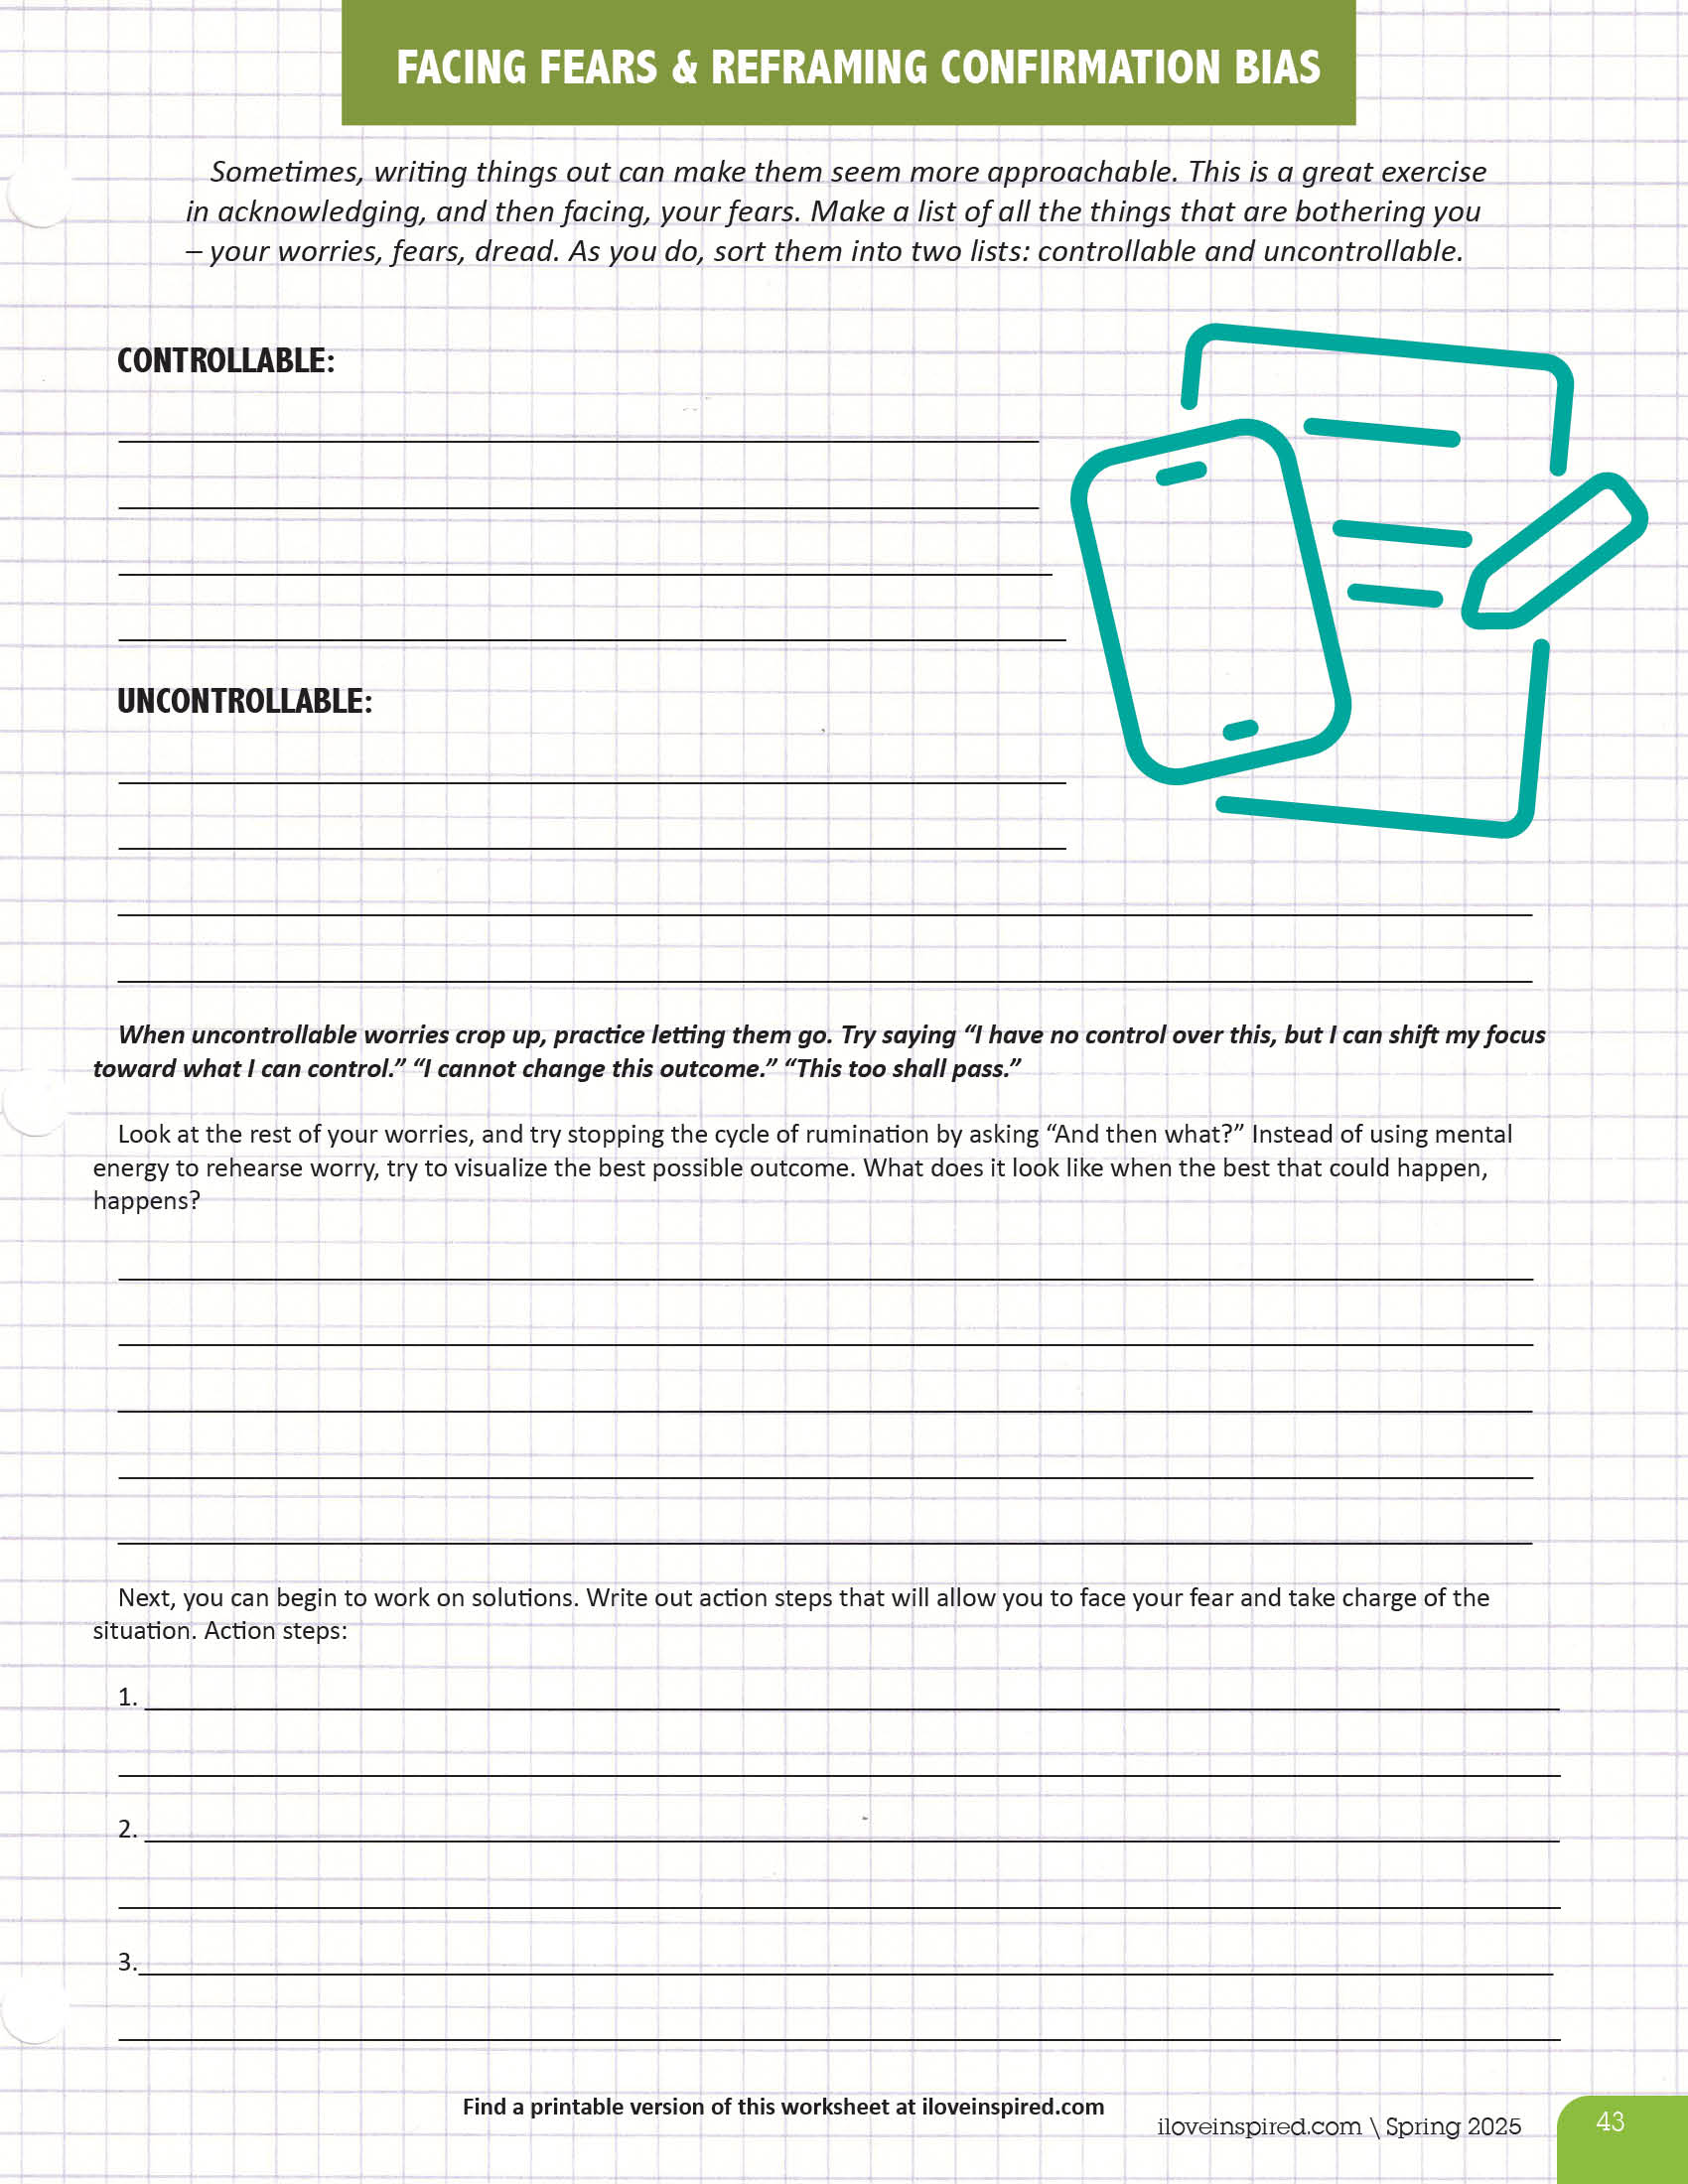
Here’s how you get out: Ask yourself, “And then what?” What happens if your worst-case-scenario comes to fruition? Let your brain find a solution. Maybe more than one. Continue asking yourself, “And then what?” until you feel a sense of completion.
Once you’ve finished working through your worry, the job is not done. Now, you need to ask yourself another very important question: “What’s the best that could happen?”
That worst-case-scenario shouldn’t get to live rent free in your head. Make room for a best-case-scenario and see what happens when you decide you deserve the best possible outcome.
Self-Fulfilling Prophecies
Do you tend to think humans are altruistic and compassionate by nature? If so, when you look around, you’ll likely find examples of humans going the extra mile to care for one another. Think the opposite? You’ll find plenty of folks who seem to show the worst of humanity.
This phenomenon is often referred to in psychology as “confirmation bias.” Whatever you expect to happen will likely happen. Our minds are conditioned to look for experiences that confirm our beliefs about others and the world.
The good news is that a confirmation bias is not fixed. We can work to train our brains to become more optimistic using a positive psychology idea called “learned optimism,” developed by American psychologist Martin Seligman, PhD.

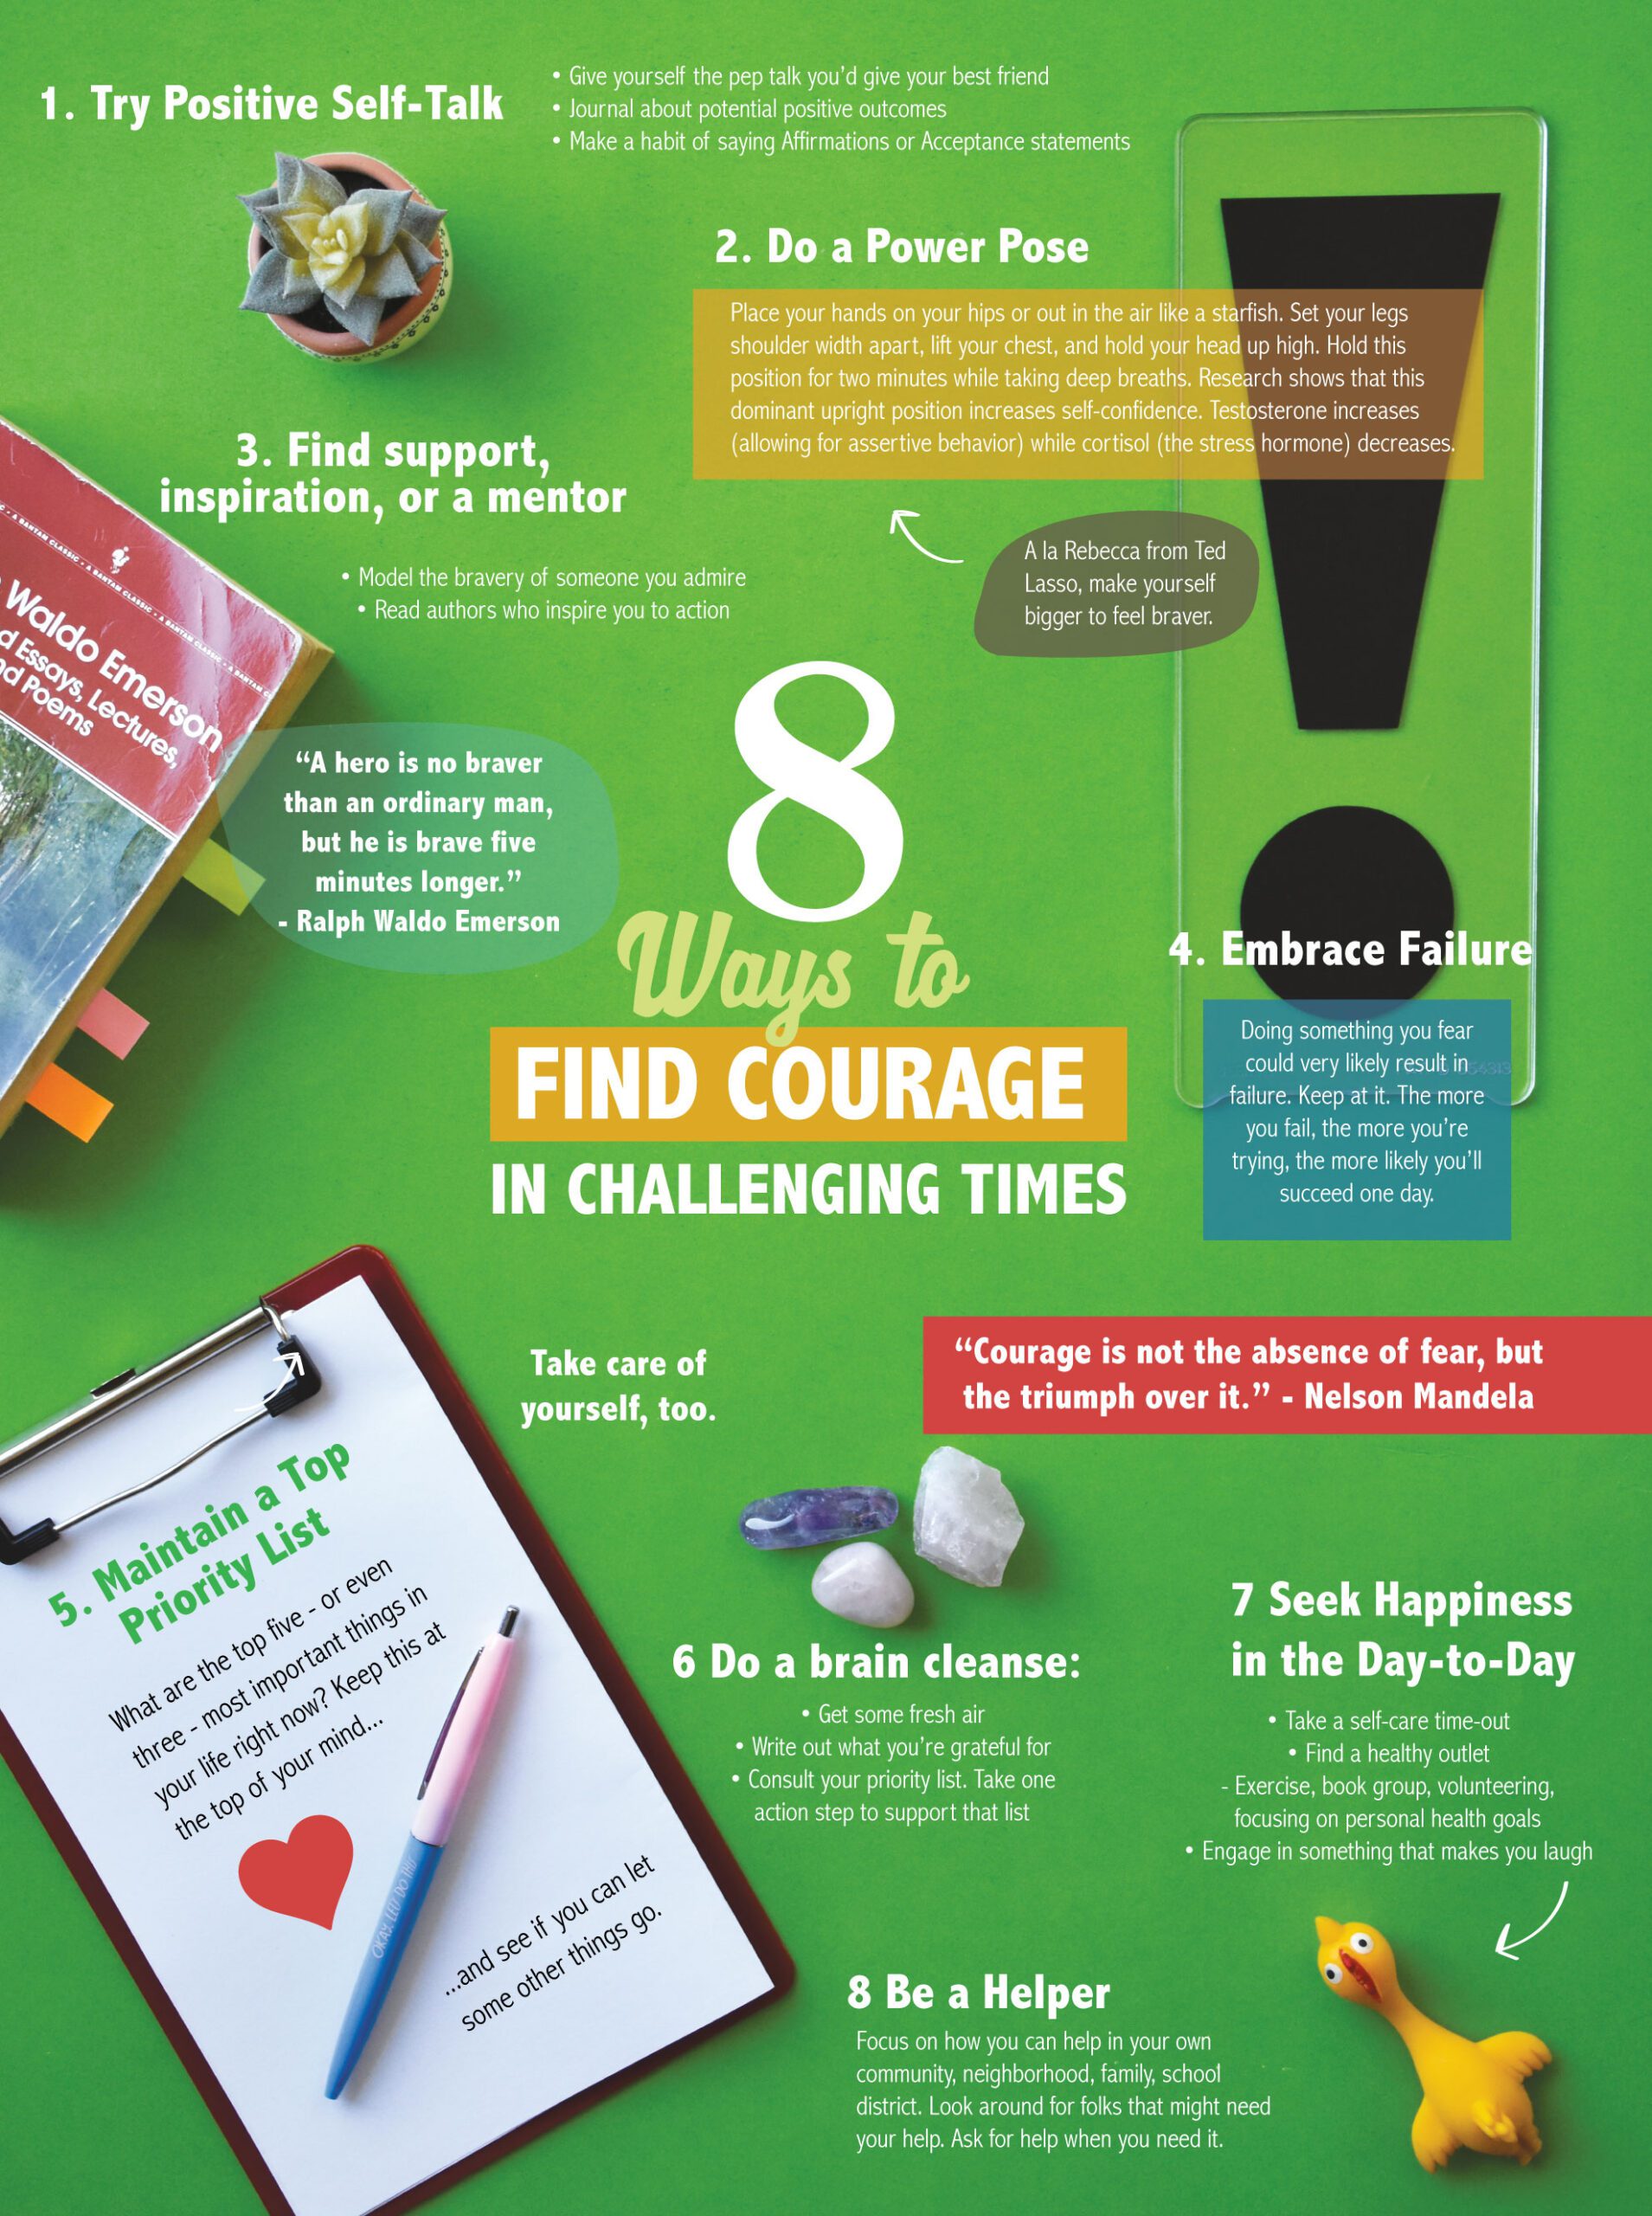
Start by identifying times when confirmation bias is causing you to see the worst in a situation. Once identified, you can try putting positive thinking strategies in place. Mindfulness, gratitude, and positive self-talk are all tools that can help shift your mindset toward greater optimism.
Think about the last time you felt optimistic or connected to others. What was your mindset during that time? What allowed you to see the best in the situation? Try to replicate that mindset by practicing what you did at that time. If you aren’t sure, implement one of the positive thinking strategies from the list above, or create your own.
It’s important to remember that learning to be more optimistic requires insight and repetition. At the outset, it will require effort. Over time and with practice, though, your brain can learn to automatically adopt a more positive mindset.
Embrace ‘What Is’ (Especially if it Scares You)
We only truly have control over (some) things in the present moment. Instead of “what if?” we want to land on “what is.”
Practice by noticing what is true for you right now. First, recognize what you cannot control: Other people’s actions, feelings, and decisions; the weather; the past. Let those things go. Next, acknowledge what is within your control: Your reactions, choices, mindset, and future. These are ripe with potential for growth and change.
Acknowledging “what is” can require facing hard truths. Sometimes, we fixate on the past or the future because we don’t want to face our current reality. We may avoid the present for a myriad of reasons: finances, health, relationships, career aspirations, or anything else that we are afraid to confront.
Fear is an emotion that instinctually propels us into action. Our bodies are designed to fight or flee in response to fear. When we run away, though, we are powerless to change our reality. We must face our fears. Avoiding them can cause a mental paralysis that keeps us perpetually in an uncomfortable situation.
Taking action releases the emotional charge of fear. Action might look like initiating a conversation, making an apology, admitting that something is not working, asking for help, or making a change.
You likely already know “what is” true for you. So now you need to make the next right decision. One next right decision at a time can move you from the paralysis of living in “what if” into the action of facing “what is.”
When you feel your fears, and take action anyway, you reclaim power over your life and the present moment.
The Power of the Mind
It’s important to note that while this may all seem simple in theory, it’s quite difficult in practice. We can expect roadblocks whenever we attempt to re-route brain circuits designed for detecting danger.
Instead of attempting to work against deeply ingrained mental patterns, we can learn to work with them. Worry and fear are natural emotions and they each have a place in our lives.
However, we do not want worry and fear to have total control. We need strategies to interrupt these cycles and bring us back into “what is.” This is a delicate balance that may require the help of a medical or mental health professional.
If you find yourself stuck in patterns of worry or fear, give yourself grace. Remember that you’re doing exactly what your brain is asking of you – surviving. Keep trying to make the next right decision when you can, and remember to pause and occasionally ask yourself: “What’s the best that could happen?”

Olivia Lynn Schnur
Olivia Lynn Schnur is a Licensed Mental Health Counselor, EMDR Certified Therapist, Reiki Master, and Certified Yoga Teacher. She writes about mental health and wellness with the goal of educating, inspiring, and uplifting others. To learn more, or to book a yoga session, visit oliviaschnur.com.