Sponsored by
Bloom Flower Farm
Bloom is a small flower farm in Northeast Iowa run by Jen Opheim and family. At Bloom, we love to watch things grow and to be creative. It all begins with a vision. Maybe you want fresh locally grown flowers for your DIY wedding bouquets. Maybe you want to promote your business with a petite posy giveaway. Or maybe you have a flower friend who would love a unique gift of blooms through our seasonal CSA. Whatever your flower needs are, we’re happy to help. Let’s create something beautiful together!
Make It: Sun Bookmark!
Sponsored by
Bloom Flower Farm
Bloom is a small flower farm in Northeast Iowa run by Jen Opheim and family. At Bloom, we love to watch things grow and to be creative. It all begins with a vision. Maybe you want fresh locally grown flowers for your DIY wedding bouquets. Maybe you want to promote your business with a petite posy giveaway. Or maybe you have a flower friend who would love a unique gift of blooms through our seasonal CSA. Whatever your flower needs are, we’re happy to help. Let’s create something beautiful together!
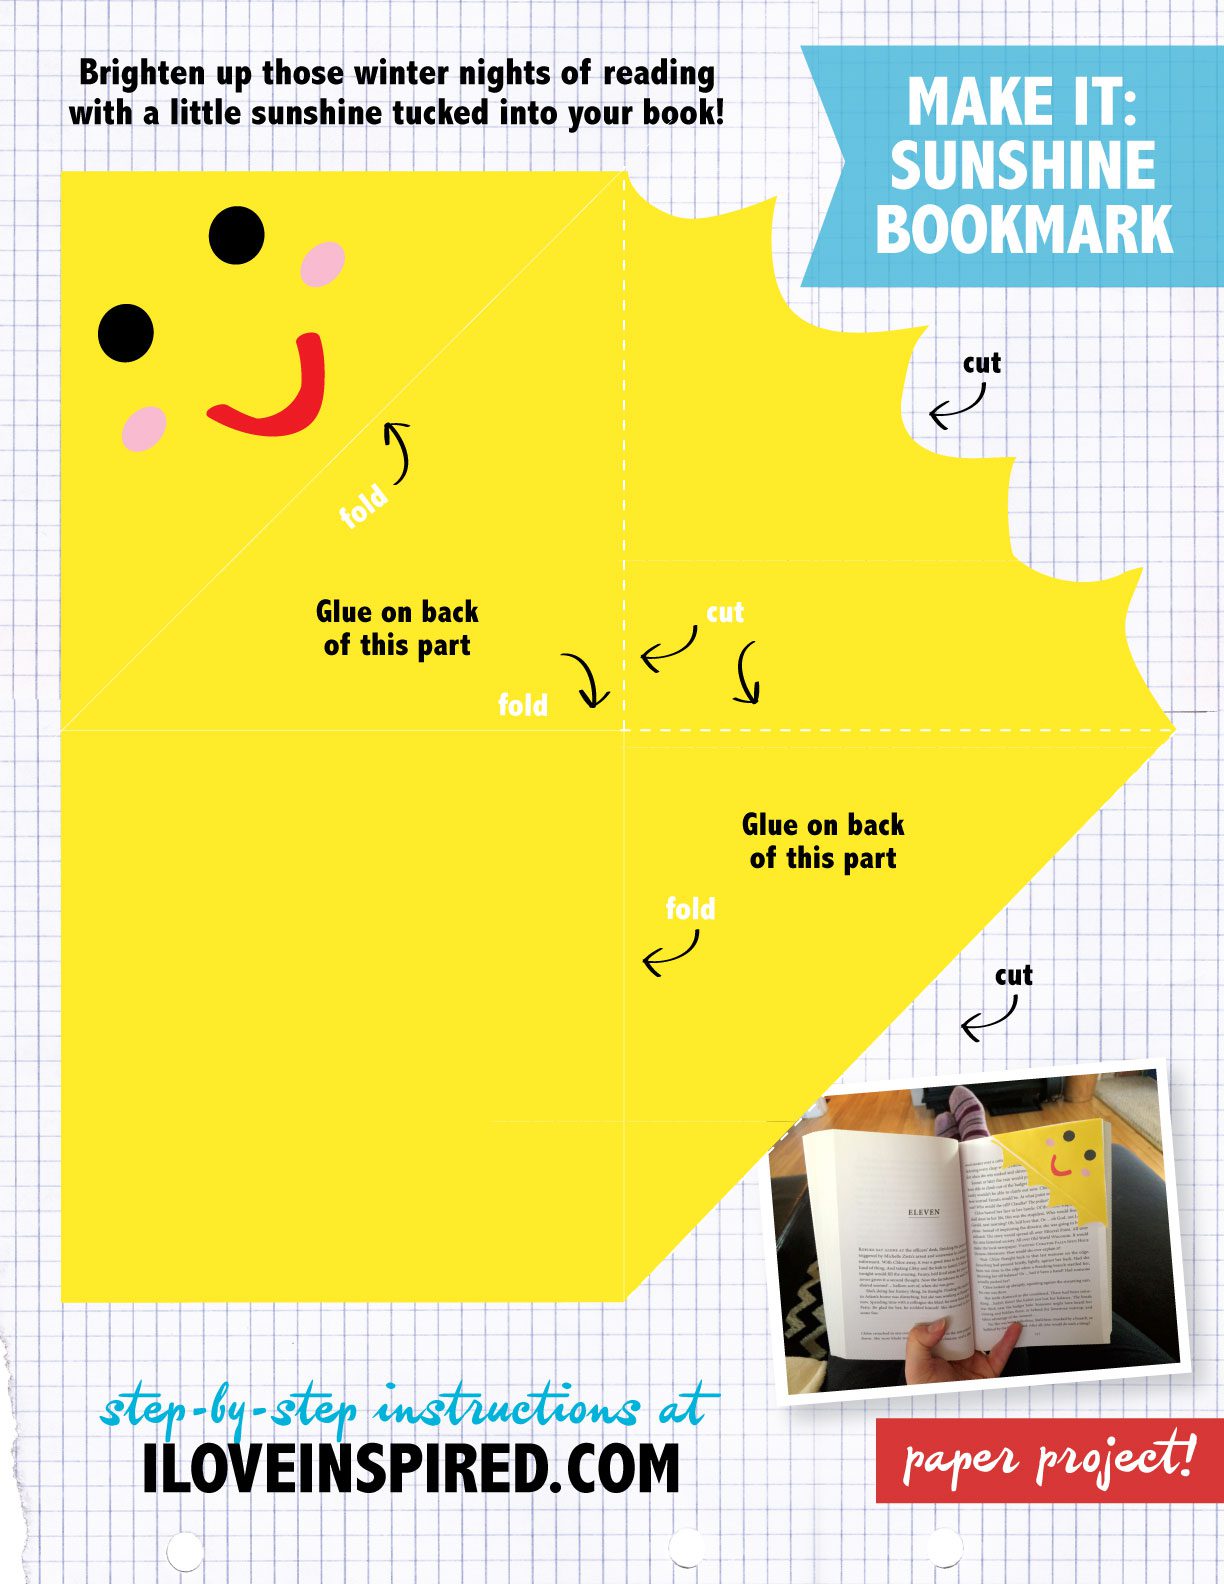
Brighten up those winter nights of reading with a little sunshine tucked into your book. Make a sun bookmark today!
What you need:
Sun bookmark template (download here)
Glue stick or other glue
Scissors
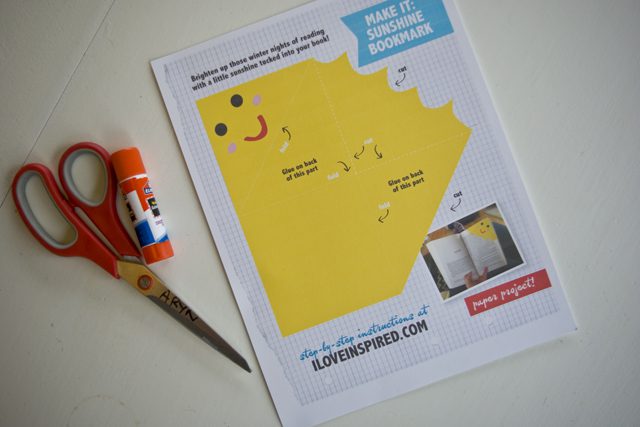
1. Print out the template (download here)
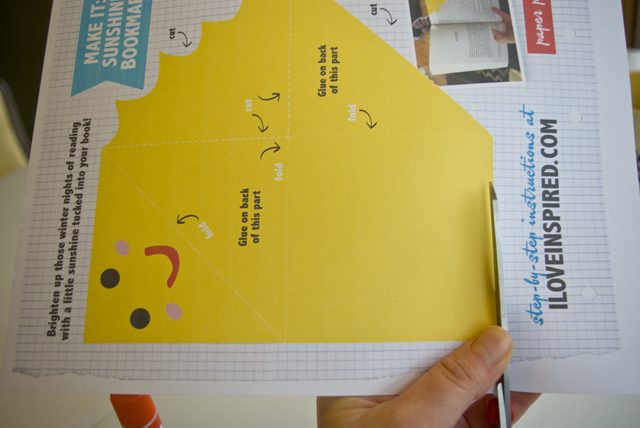
2. Cut out the yellow part
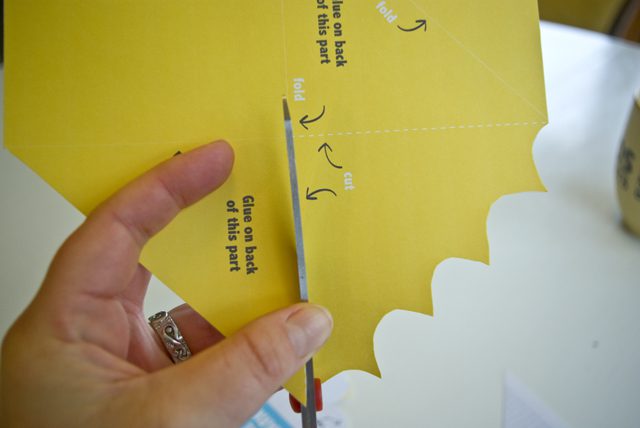
3. Cut out the sun ray section (see where the template says “cut”)

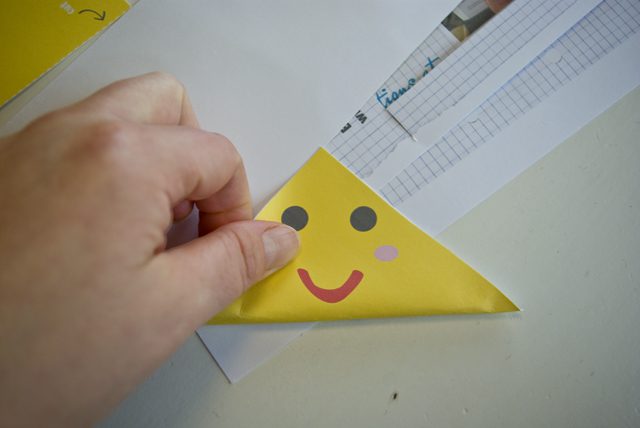
4. Fold the sun face over backwards and make a defined crease
5. Glue under the sun face and fold into place
6. Now your yellow shape should look like this!
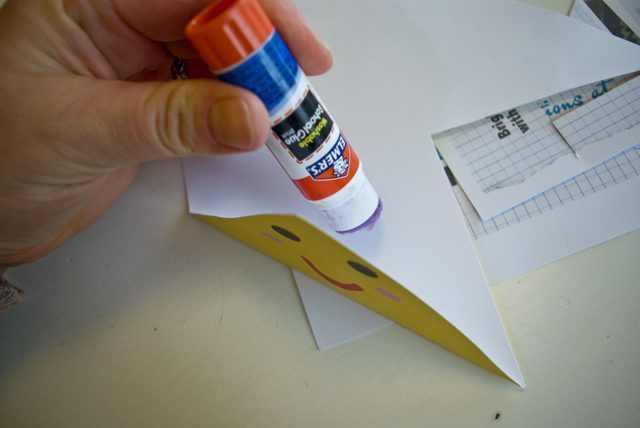
7. Fold the right “ear” forward toward you
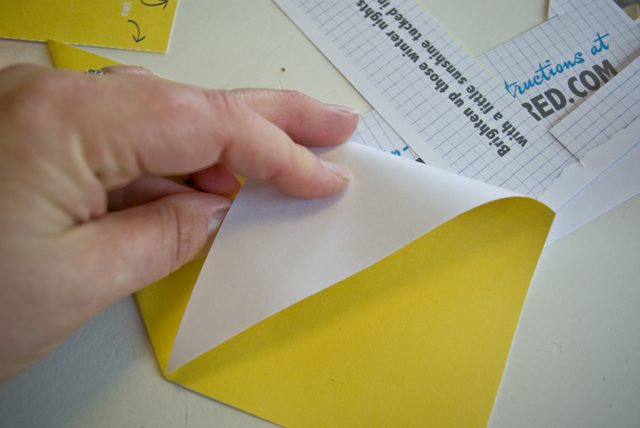
8. Make a defined crease
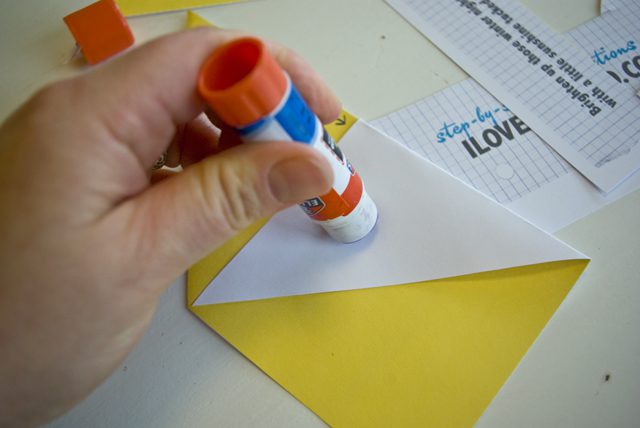
9. Glue the white part that you just folded over

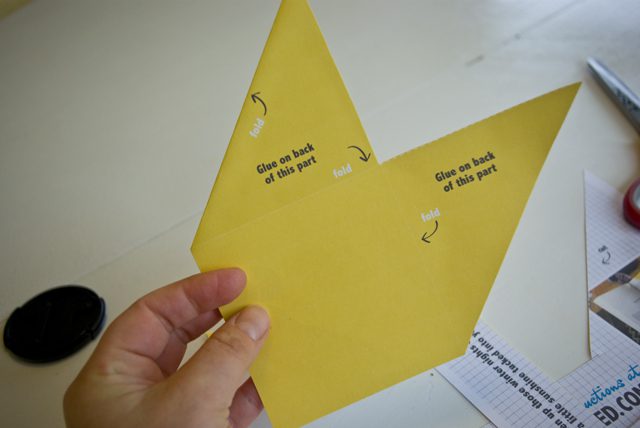
10. Fold the sun part over the freshly glued section to form a square

11. Just one part left!
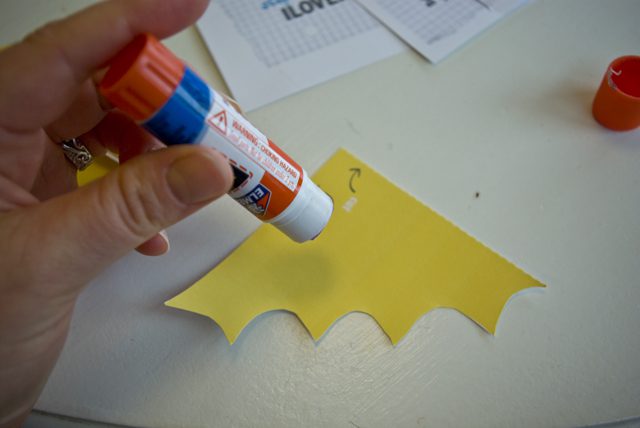
12. Glue the top portion of the sun rays (leaving just the jagged rays unglued)
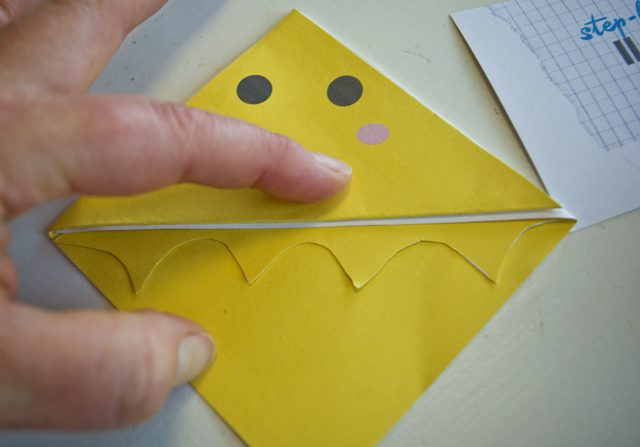
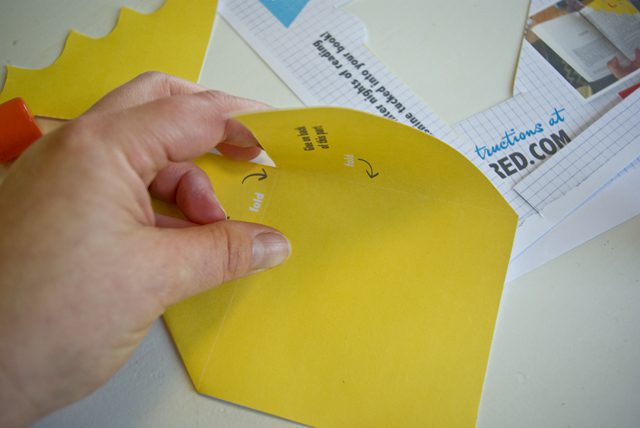
13. Tuck the rays up into the bookmark and press down to glue it to the backside of the sun face
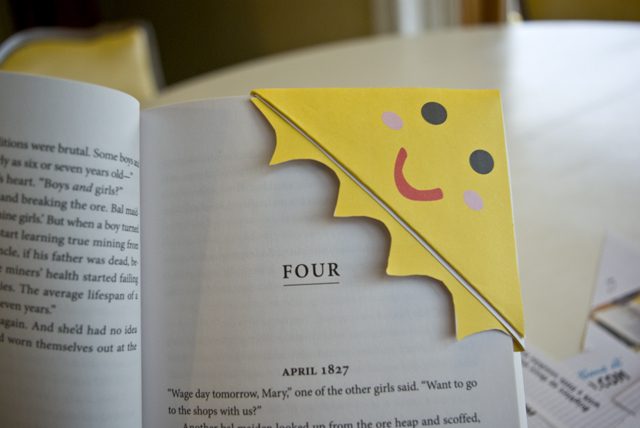
14. Save your place in your current book with your brand new sun bookmark! Happy reading!